


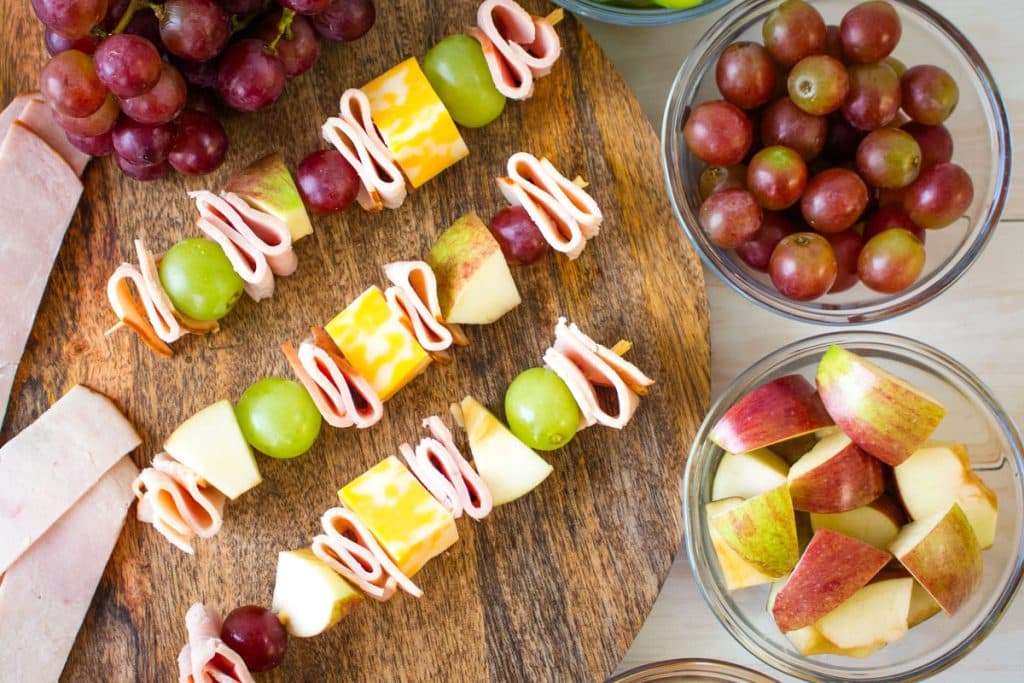
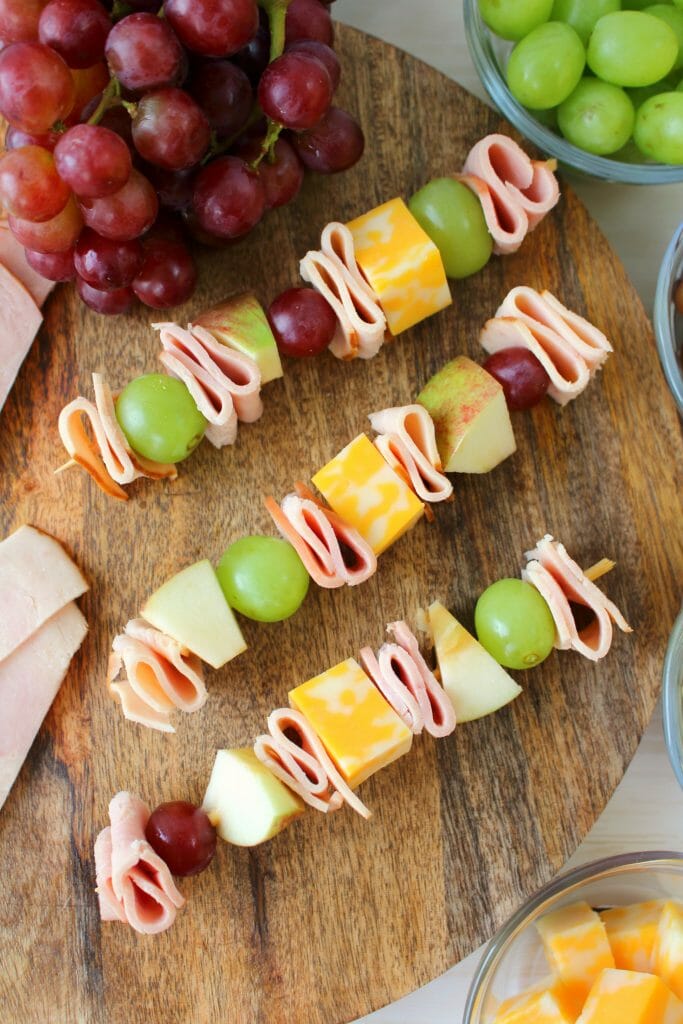
Looking for school lunch ideas? These fun and easy cheese and meat kabobs with fruit will have your kids excited to pack their lunchbox. These meat and cheese skewers are loaded with sliced turkey, ham, fruit and cheese. Great for the kid that won’t eat a sandwich!
There is something about the start of a new school year that brings excitement and optimism. Perhaps it’s the idea of new teachers, new beginnings and the reunion of friendships. As a kid, I secretly loved the start of the new school year, even if it meant the end of summer.
Lunchtime is always a great way to socialize with those old and new friends at the lunch table. These yummy meat and cheese skewers are healthy, nutritious and perfect for refuel your kid’s bodies and minds for the rest of the school day.
Ingredients for Meat and Cheese Skewers
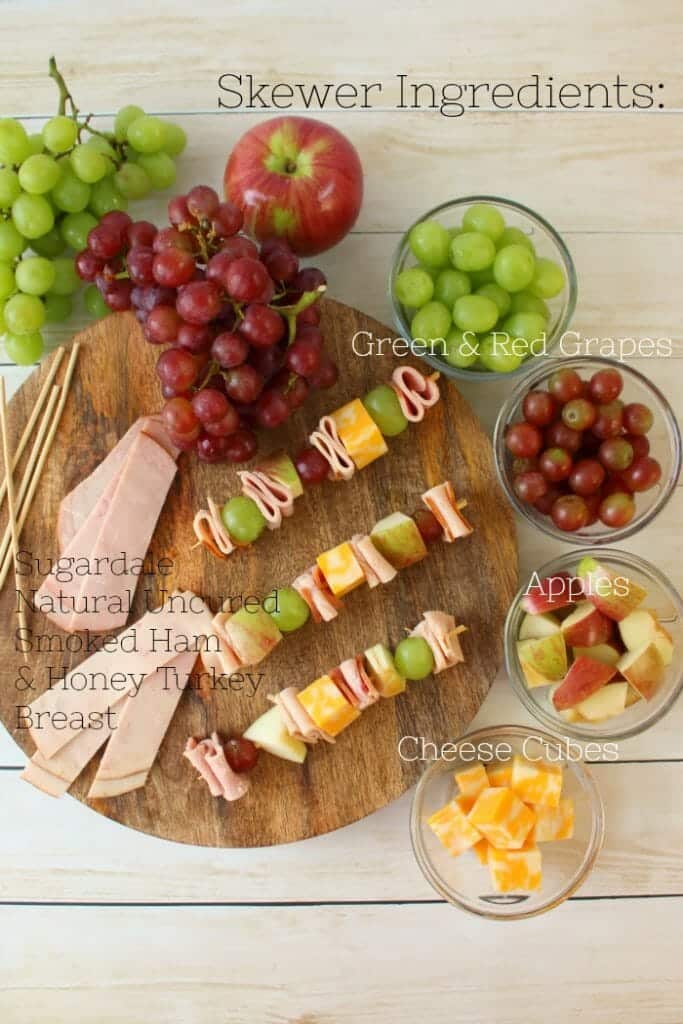
Here’s the ingredients you’ll need to make these simple, kid-friendly meat and cheese skewers:
- Apples – any variety your kids enjoy. You can use Honeycrisp, Pink Lady, Granny Smith, Cosmic Crisp or Red Delicious.
- Grapes – red and green grapes are great. Feel free to use one or both knowing what your kids will eat.
- Cheese cubes – you can use any type of cheese your kids enjoy. Colby Jack, Cheddar, White Cheddar or even mozzarella sticks. You can even buy cubed cheese, often found where mozzarella sticks are located.
- Deli-sliced Ham – you can buy pre-sliced ham (I recommend a thicker cut), or go to your deli and ask for a thick-cut or “dinner cut” where they can give you thicker slices. Another option would be to purchase a “ham steak” which is a pre-cooked thick slice of ham.
- Deli-Sliced Turkey – my son likes smoked turkey, but free free to choose any type of turkey you like. Much like the ham, I recommend getting a thicker cut of turkey, which helps in the assembly process of the skewers.
Fun Variations: Swap the Meat, Cheese and Fruit
As parents, we know the key to getting our kids to actually eat their lunch; choosing items we know they will like and enjoy. Here are some options to choose from to help change things up and get your kids to eat and enjoy their skewers.
- Fresh Mango
- Fresh pineapple
- Cantaloupe or Honeydew melon
- Peaches, pears and plums
- Dried fruits, like dried apricots, dried mangos, dates and plums
- Berries – strawberries, raspberries, blueberries or blackberries
- Mozzarella cheese
- Pepperjack cheese
- White or sharp cheddar
- Deli-sliced roast beef
- Left-over pork-loin roast
- Leftover turkey breast meat
- Roast, grilled or rotisserie chicken
- Pepperoni or Canadian Bacon
- Beef sticks, cut into chunks (Costco has a fantastic option from Greenridge Farms, that are nitrate, nitrite and refined sugar free)
How to Make Meat and Cheese Kabobs (Step-by-Step)
Step 1: Slice the turkey and ham into 1″ strips
Simply take out a couple of slices of both the ham and turkey. With a sharp knife, cut the meat into 1″ strips. You’ll then fold the strips “accordion style and begin skewering onto wooden grilling skewers.
Tip: Pre-measure your wooden skewers to make sure they fit into your kid’s lunchbox container. Trim off any rough edges with kitchen shears. You can also find these wooden appetizer skewers on Amazon. They are a medium-size, making them the perfect fit for a lunchbox container.
This recipe is also a great way to use leftover ham that you might have from preparing a holiday spiral ham. Another great leftover ham recipe is our Crock Pot Ham and Bean Soup. Check out our recipe for How to Bake a Spiral Ham for more ideas.
Step 2: Rinse grapes and slice apples
This is a great step to get your kids involved. Rinsing and washing the grapes and removing them from the stems. This is an easy job that kids can easily help with. Have them place the washed grapes into bowls or containers.
Slice and chop your apples. I would recommend cutting into slices, then cubing into 1″ pieces, which will help with placing them on the skewers.
Tip: Adding a lemon juice or lemon-lime soda (like Sprite or 7-up) will help prevent the apples from browning after cutting. The citric acid helps keep the apples fresh and the flesh unbrowned.
Step 3: Assemble the Meat and Cheese Skewers
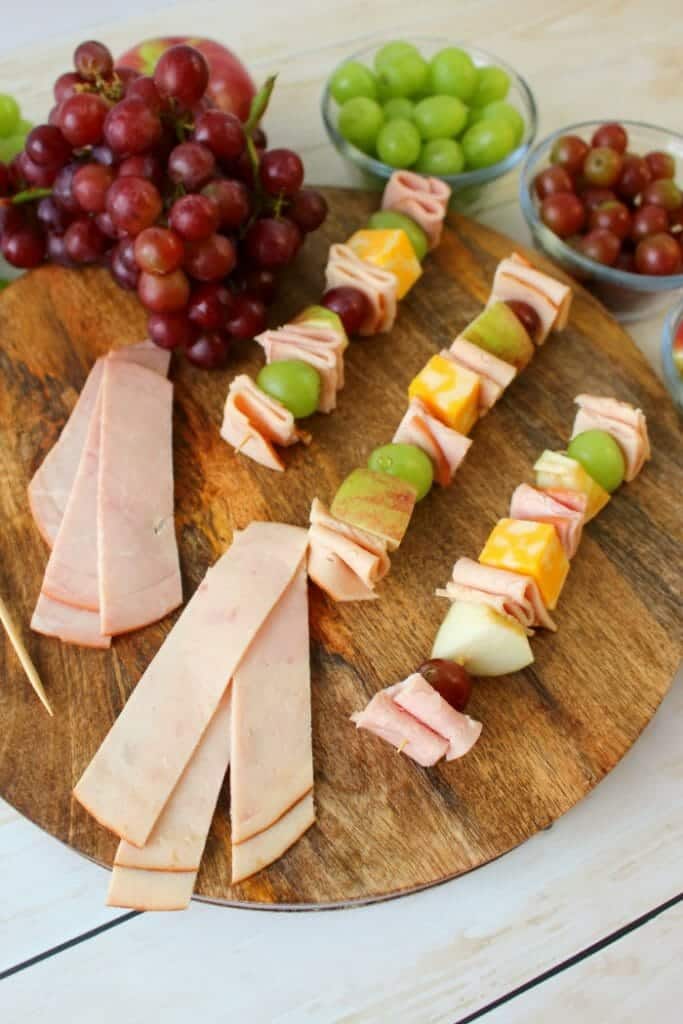
Here’s a simple order to place the meat, cheese and fruit. Getting your kids involved here is a great way to get these done in a flash – and best of all, they will be interested and feel included in making and prepping their lunches. You can place the meat, cheese and fruit in any order, but here’s how we did it:
- Alternating Green & Red Grapes
- Apple Chunks
- Cubed Jack Cheese
Simply alternate meats with the fruits and cheeses onto the wooden skewers. These come together quickly and easily. Best of all, your kids will love assembling these – before you know it, they will be packing their lunches all on their own.
If your kids love snacking on fruit, try my Greek Yogurt Fruit Dip, which is fantastic with apple slices, strawberries, grapes and bananas.
Make-Ahead and Storage Tips for Lunchboxes
- To prevent apples from browning, I recommend adding lemon juice or lemon-lime soda (like Sprite or 7-Up). You can soak the apples in a bowl with the juice or soda for a few minutes before adding them to the skewers.
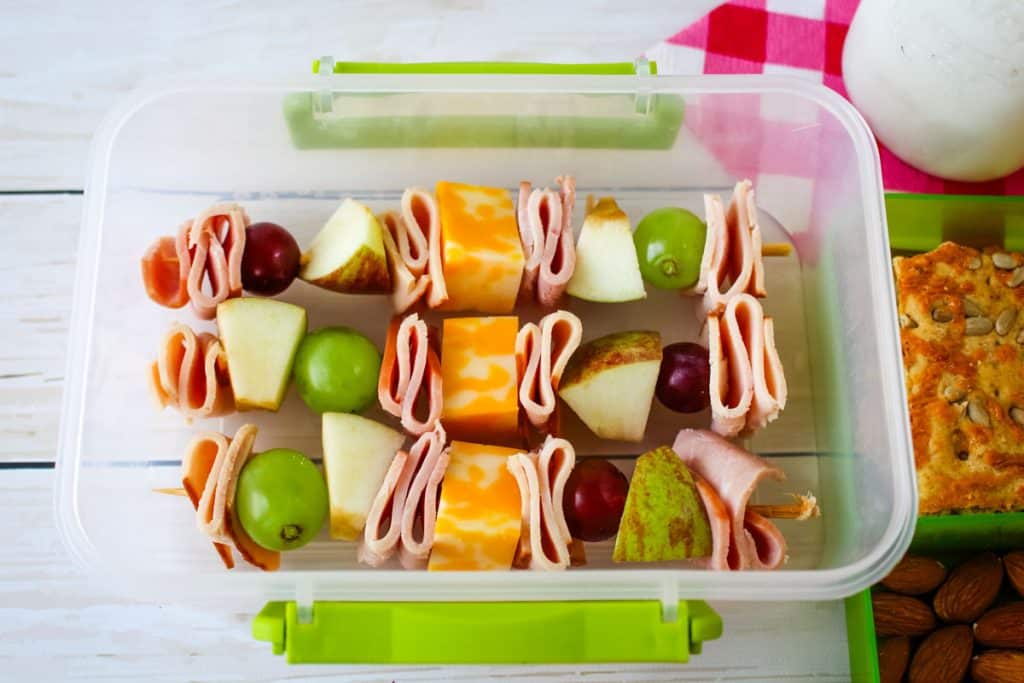
- The skewers can be assembled up to a few days in advance. Store the skewers in the refrigerator in an airtight container or zip-top containers to keep them as fresh as possible.
- Feel free to utilize fruits that are in season, and especially those that your kids enjoy. Same goes with the types of cheese and meat that you include.
Are you shopping for ingredients at Target? While you’re there, pick up some of my 30 Best Healthy Target Snacks for some quick and easy healthy snack options.
Not only are these skewers nutritious, they’re a fun, interesting alternative to the same old sandwich or applesauce. They’re a great way to get your kid excited to eat something healthy.
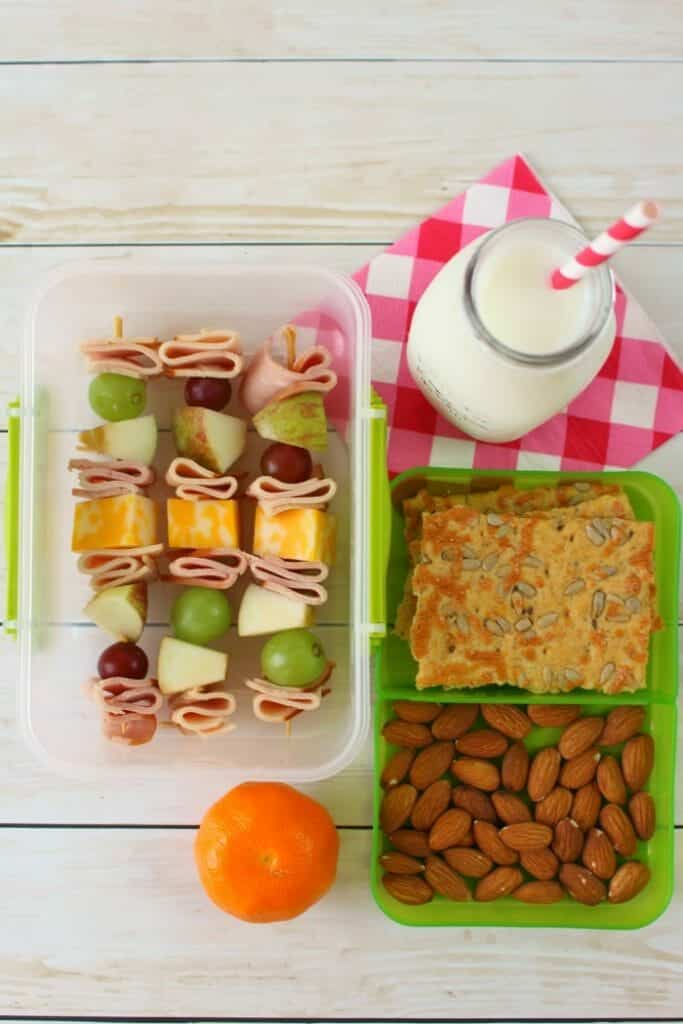
Pack these with some savory crackers, nuts or some crunchy vegetables. Not only will your kid be refueled for the rest of the day, they’ll be excited to enjoy lunch with their friends. Sometimes, the best school memories are made at the cafeteria tables surrounded by your best friends.
FAQ’s for making Meat and Cheese Skewers:
I recommend soaking the apple chunks in 7-up or Sprite for a few minutes before assembling. The citric acid in the soda will help prevent the apples from turning brown. You can pour lemon juice over the top of the apples.
When kept in an airtight container, the meat and cheese skewers will last several hours in a lunchbox. I recommend packing with a cold-pack that comes from the freezer to keep the skewers cool and appetizing to kids.
The best cheese for these lunchbox skewers is any cheese you know your kid will eat. You can use Colby, Cheddar, Mozzarella, White Cheddar, American or any other cheese you know your child will enjoy. I don’t recommend soft cheeses, as these will quickly become messy and not stay on a skewer.
Yes, meat and cheese kabobs can definitely be made in advance. Wash and cut the fruit, cube the cheese and cut the meats. Get your kids involved, as this is a great way for them to asseble their own lunches. When kept cold and refrigerated in a resealable container the skewers will last 2-3 days after assembling.
Yes, these are definitely a healthy choice for a kids (or grown-up!) lunch. The fruit gives the kids much-needed fiber, vitamins and minerals, and the meat and cheese will provide protein to help keep them full and their bodies growing. These are also a great option for kids that don’t like sandwiches or don’t want bread in their lunch.
If you loved these fun and easy meat and cheese skewers, then check out these other kid friendly snack and lunch ideas:
- Cranberry Turkey Roll Ups
- Easy Turkey Wrap Recipe
- Cranberry Chicken Salad
- Chicken Salad with Grapes Recipe
- Hawaiian Ham & Pineapple Kebabs
- Healthy Egg Salad
- Greek Yogurt Veggie Dip
- Tropical Pineapple Mango Salsa
Want to Save This Recipe?
Enter your email & I’ll send it to your inbox. Plus, get great new recipes from me every week!
By submitting this form, you consent to receive emails from Delightful E Made.
Meat and Cheese Skewers (Easy No-Sandwich Lunch Idea)

Equipment
- Cutting Boards This 3-Pack of non-slip cutting boards are a fantastic tool for every home cook.
- Pairing Knives This 3-knife set from Cuisinart is very afforadable and ideal for everyday use in the kitchen!
- Wooden Skewers This wooden bamboo skewers are great for these kabobs. Can be cut to size, too!
- Lunchbox Storage Containers These Rubbermaid food storage containers are ideal for lunchboxes. No leaking and very durable!
Ingredients
- 1 slice deli ham
- 1 slice deli turkey
- 1/2 cup red grapes
- 1/2 cup green grapes
- 1/2 cup cubed apples
- 2 oz. jack cheese cubed
Instructions
- Pre-cut wooden grilling skewers to fit into the size of your resealable lunchbox container.
- Cut ham and turkey slices into 1″ strips. Fold accordion-style and slide onto the wooden skewers. Alternate with grapes, apples and cheese cubes.
- Keep cold (with a cold pack) in a lunchbox until ready to eat.
Notes
Nutrition

These look so good! I would love to eat this for lunch. Thanks for sharing at Merry Monday.
My granddaughter would love these skewers. She’s not a fan of sandwiches(bread), so these would be perfect in her lunch. Thanks for sharing on Sunday’s Best.
this is a wonderful idea. Found you on Grandma’s House We go Link Party.
Everything tastes better on a skewer! 🙂 Thanks for sharing with SYC.
hugs,
Jann
I’ve never thought of skewers for lunches! Thanks so much for sharing at our To Grandma’s House We Go DIY, Crafts, Recipes and more Link Party! Pinned this! Hope you join us again next week!
Thanks for sharing with us at Fiesta Friday!
Mollie
Your Turkey and Ham Skewers will be a great Lunchbox idea! Hope you are having a great week and thank you so much for sharing with us at Full Plate Thursday!
Miz Helen
Great idea, especially for kids who don’t like sandwiches. Thanks for sharing at the inspiration spotlight party.
We will be heading back to school in a few weeks and I would really love to have an arsenal of ideas to prevent defaulting to prepackaged less than good for you options. This one is definitely going on the list!
Slightly related…have you paired purple grapes with white cheddar cheese? The best snack ever!
Visiting via Melt In Your Mouth Monday but I’m pretty sure I have been here before 🙂
These are the cutest things! I love this idea. Do you think it would work to make several lunches worth ahead of time and keep them in the fridge for a few days?
That looks like such a yummy lunch! Thank you so much for sharing with us at Encouraging Hearts and Home. Pinned.
Forget the lunchbox. 😉 These look good for me! 🙂 Here from What’s for Dinner?
Blessings,
Babychaser
mamasbrush.wordpress.com
I love these! With school starting in a couple of weeks here in Ontario, I am putting these on the list of must-try’s. Thanks for sharing! From the folks at MississaugaMom
What a great way to encourage kids to actually eat their lunches! These turkey ham skewers look delicious and are fun to eat too! Thank you for sharing this post with the Hearth and Soul Link Party. I’m featuring your post at the party this week, Erin. Hope to ‘see’ you there!
What a yummy lunch idea! I know kids (and adults) who would REALLY enjoy these! And what a great mix of flavors and textures. There is something everyone will love!
I don’t have to pack lunches anymore but these would be great for a party too. Thanks for sharing at #HomeMattersParty
What a fun and healthy lunchbox option Erin.
Thank you for sharing this recipe at Create, Bake, Grow and Gather this week. I’m delighted to be featuring this recipe at tonight’s party and pinning too.