Looking for a fun and easy holiday treat to make with your kids or grandkids? These easy Rice Krispie Christmas Trees are perfect! Decorated with mini M&M’s, Reese’s peanut butter cups and sparkle gel frosting, these Christmas tree rice krispie treats are loved by young and old alike.
This post may contain affiliate links. Delightful E Made is a participant in the Amazon Services LLC Associates Program, an affiliate advertising program designed to provide a means for us to earn fees by linking to Amazon.com and affiliated sites.

{Introduction 2-3 short paragraphs that include what the recipe is about and what it will teach the audience}

What do I need to make Christmas tree rice krispie treats?
To make these rice krispie treats, you’ll need the ingredients to make the treats, as well as toppings for decoration. Here’s a quick-reference checklist of everything you’ll need:
- Krispie rice cereal – feel free to use store brand or name brand, as both are nearly identical.
- Mini marshmallows – if you already have large, regular sized marshmallows, you’ll need about 40 large to equal 1 (10 oz.) bag of minis. Here is a great marshmallow conversion chart.
- Butter – this is essential for melting the marshmallows and combining with the cereal.
- Green food coloring – this is essential for creating the green color of the trees.
Decorations:
- Christmas sprinkles – these are added on top of the rice krispie treats before cutting.
- Mini Reese’s peanut butter cups (the 1″ size) – these are sliced in half and added to the bottoms of the trees to represent the tree trunk.
- Mini M&M’s – these are the perfect size for creating Christmas lights on the trees.
- Star sprinkles – I found these at my local craft store.
- White sparkle gel icing – found near the cake decorations at my local grocery store. You could also use black to represent the strings of the Christmas lights.
For exact ingredient amounts and full recipe instructions be sure to scroll down to the bottom of the post for the recipe. Thanks!
How do I make Christmas tree rice krispie treats?
The first step to making rice krispie Christmas trees is to first melt the marshmallows and butter together. Many do this on the stovetop, but I prefer to do it in the microwave. The microwave doesn’t overheat the marshmallows, which helps keep the treats soft and chewy.
To the melted marshmallows and butter, you’ll add the green food coloring to tint the marshmallow trees green. Pour the green marshmallow mixture onto the cereal and mix well to combine.
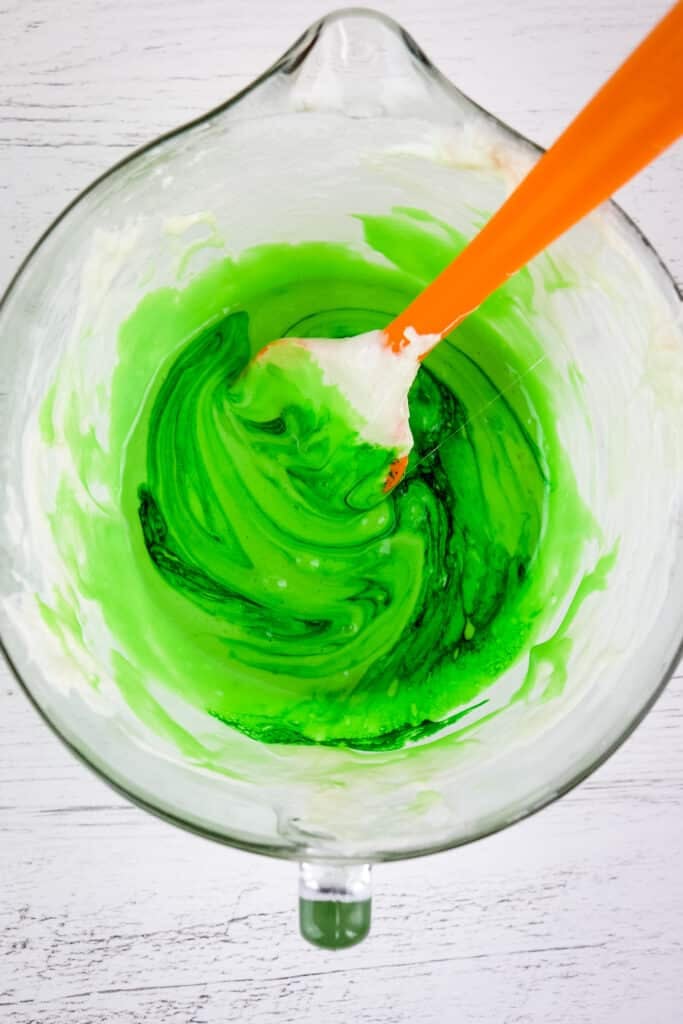

Generously spray a 9 x13″ pan with non-stick spray. Pour the rice krispie mixture into the pan and press firmly to create an even layer of rice krispie treats.
Sprinkle the top of the treats with the Christmas sprinkles. Let the treats cool to room temperature. This is helpful in making sure the treats hold their shape when sliced.
How do I keep my hands from sticking to the rice krispie treats?
Generously spraying your hands with non-stick spray will help keep your hands free of the sticky marshmallow mixture. This is very helpful when pressing the treats into the pan with your hands.


How do I cut Rice Krispie Christmas Trees?
To create the shape of a Christmas tree, simply cut the 9 x 13″ pan shape into three long, horizontal strips. Then, cut each strip into 3″ triangles. You’ll have a slight amount of excess at each end. (See photo above) Free free to snack on the excess pieces or have your kids decorate them into whatever they wish.

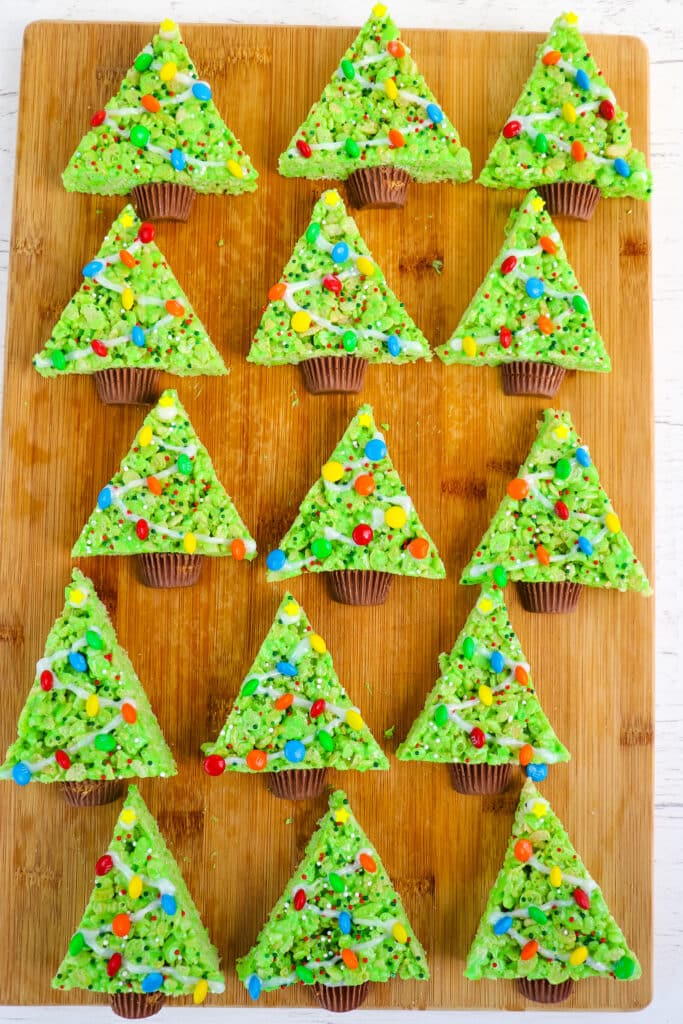
Decorating the Christmas Tree rice krispie treats:
This is the fun part! To decorate the trees, place the mini M&M’s, star sprinkles and halved mini Reese’s peanut butter cups into separate bowls.
Using the white sparkle gel frosting, add a dot to the top of the triangle for sticking on the star. Add another small amount to the top of the halved peanut butter cup. This will help it stick to the bottom of the tree, symbolizing the tree trunk.
Using the gel frosting, decorate lines on the trees to symbolize strings of Christmas lights. Add the mini M&M’s to the lines of gel frosting to symbolize the lights.
Let the treats set for 1-2 hours at room temperature to let the frosting harden.
Frequently asked questions about making rice krispie treats:
First, and most likely culprit is too high heat when melting the marshmallows and butter. For best results, use a microwave or if melting on a stovetop, use medium-low heat. Also, once treats are made, store in an airtight container to prevent from drying out and hardening.
To soften rice krispie treats, I recommend using 1/2 – 1 cup less rice krispie cereal. This will render an extra soft, chewy treat. Also, when melting the marshmallows, be sure to heat over medium-low heat, not high heat.
Yes, butter is necessary in keeping the treats soft once they are made. I don’t recommend leaving out the butter.
Many use maple syrup instead of marshmallows. The consistency is different, and not as soft and gooey as marshmallows.

Do you love making rice krispy treats? Check out some of my other cereal treat ideas:
- Chocolate Rice Krispie Treats
- Spring Rice Krispie Cake
- Chocolate Peanut Butter Rice Krispie Treats
- M&M’s® Spring Flower Pops
- Candy Corn Krispie Cake
- Fruity Pebble Treats
- Lucky Charms Treats
If you loved this holiday treat, check out my other popular holiday sweets:



Want to Save This Recipe?
Enter your email & I’ll send it to your inbox. Plus, get great new recipes from me every week!
By submitting this form, you consent to receive emails from Delightful E Made.

Rice Krispie Christmas Trees
Equipment
- 9 x 13" Pan This 9 x 13" Non-stick pan is great for rice krispie treats!
- Glass Mixing Bowls Ideal for going into the microwave for making rice krispie treats!
- Rubber Scrapers These Cuisinart rubber scrapers are a must-have tool for any kitchen!
Ingredients
- 6 cups krispie rice cereal
- 1 (10 oz. bag) mini marshmallows
- 5 Tablespoons butter
- Green food coloring about 60 drops
Decorations:
- 1 Tablespoon Christmas sprinkles feel free to use more if you prefer
- 10 mini Reese’s peanut butter cups halved
- 20 yellow star sprinkles
- White sparkle gel icing
Instructions
- To a large mixing bowl, measure out the rice cereal. Set aside. Spray a 9 x 13" pan with non-stick baking spray. Set aside.
- In a separate microwave safe bowl, add the marshmallows and butter. Microwave 1 minute, stir to incorporate the butter. Microwave again for 30-45 seconds until the marshmallows are nearly melted. Stir well until smooth and the marshmallows and butter are melted together.
- Add about 60 drops of green food coloring to tint the marshmallow mixture bright green. Stir well so that the marshmallow mixture is completely green. Pour into the cereal.
- Working quickly, stir the marshmallow mixture and cereal together so that the cereal is completely coated. Pour the cereal into the prepared 9 x 13" pan. Spray your hands with non-stick spray and press the cereal evenly and firmly into the pan. Sprinkle the cereal treats with the Christmas sprinkles. Let the treats cool for 15-30 minutes to room temperature.
- Invert the treats onto a large cutting board, or baking sheet, flipping the treats over with another baking pan, so that the sprinkle side is facing up. Cut the treats into 3 long strips, each 3" wide and 13" long. Cut each long strip into triangles.

- Separate each triangle and decorate. Use the gel icing to act as a glue to stick the stars at the top of each tree. Also use the icing to stick the halved peanut butter cups onto the bottom of each tree to represent the tree trunks. Use the gel icing as the Christmas light strings, and place the mini M&M's as the Christmas lights.
- Let the treats set out for 1-2 hours to let the icing dry. Serve and enjoy right away.
Notes
Nutrition







Speak Your Mind